Edit: This was given CVE-2022-25568. As mentioned in my previous posts here and here, I’ve done a little digging into the conditions that are required for the MotioneEye config file to be world viewable, and I’ve reached this conclusion:
As long as a “user” password is not set, the config file will be world readable. Even if an “admin” password has been set, the /config/list file will still be readable by everybody. So, while someone could think they are doing the correct thing by creating a password for the admin user, they may still be leaking private information. Here is a innocuous example from a live instance:
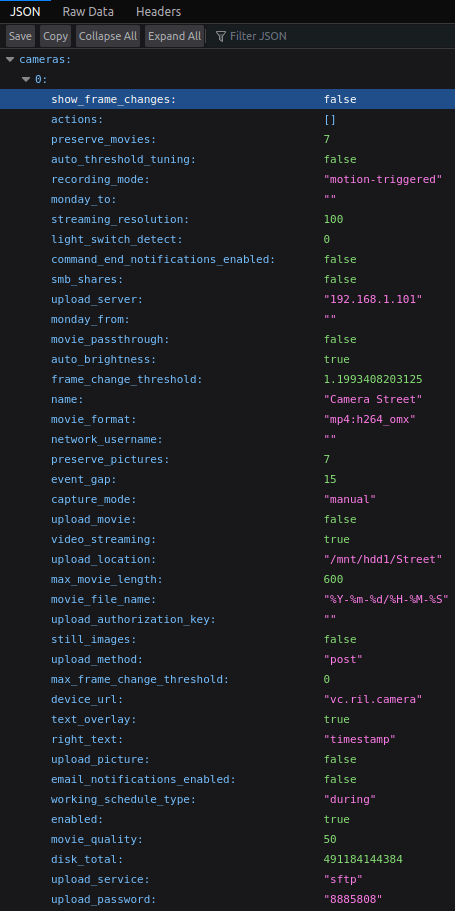
As you can see in this picture, IP addresses/services/passwords are exposed. This is a rather innocuous example, being that it is an internal IP address, but it illustrates how this could be an issue. Imagine if those were your public FTP server credentials. Or if they were your gmail credentials for smtp notifications. The list goes on.
Along with usernames, passwords, auth keys, and email addresses, these config files also contain less sensitive information like internal network IP addresses and URLs, drive and mounting information.
In many ways this vulnerability may be worse that the MotionEye RCE vulnerability that I reported and received a CVE for. In that case, the admin password needed to be left blank (or easily guessed) for someone to get into the admin panel and achieve RCE. In this case, a user could think they’re being secure by setting an admin password, but they leave the user password blank – and the config remains viewable.
I’ve found gmail, gdrive, ftp, sftp, telegram stuff (not sure how auth works there), etc. all exposed to the WWW in these files.
I’ve submitted an issue on the MotionEye github page, but if it is anything like last time, they don’t plan on fixing it/see it as a non-issue.
Edit: The issue was closed before I even finished this post.
Edit: The issue was reopened and I submitted a pull request to fix the issue, although my fix was not tested much, so it may not work properly.